Welcome to part 2 of The Great Robotic Vacuum Showdown! If you didn’t have a chance to check out Part 1 of this series where we took apart the Roomba, go ahead and check that out first.
Neato Robotics is a newcomer to the robotic vacuum business compared to iRobot; it only began shipping products in 2010. However, it quickly established itself as a worthy competitor: Roomba and Neato are now the two most recognizable brand names for robotic vacuums.
Neato is headquartered in Newark, California, whereas iRobot hails from Massachusetts. We didn’t mean for this to turn into a East Coast vs. Best Coast competition, but it is what it is now!
We are tearing down the XV-21 model, one of Neato’s best selling models. The XV-21’s original MSRP was $429, a little bit more expensive than Roomba 650. However, it was launched way back in 2012, so you can find great discounts on this model today.
Mechanical System
At first look, the Neato has almost a vintage air to it, thanks to its color scheme. I gotta say, anything on the light grey to beige spectrum doesn’t do electronics any favors.

Flipped on its back, this Neato bot shows us its many screws. There is only one brush, vs. the two counter-rotating ones on the Roomba. Fans of Neato say the square nose helps the Neato clean corners much better than the Roomba. The brush is also longer because it’s not stuck between the wheels, which allows it to cover more area per pass.
The tires look very similar to the Roomba. Actually, the threads are exactly the same.

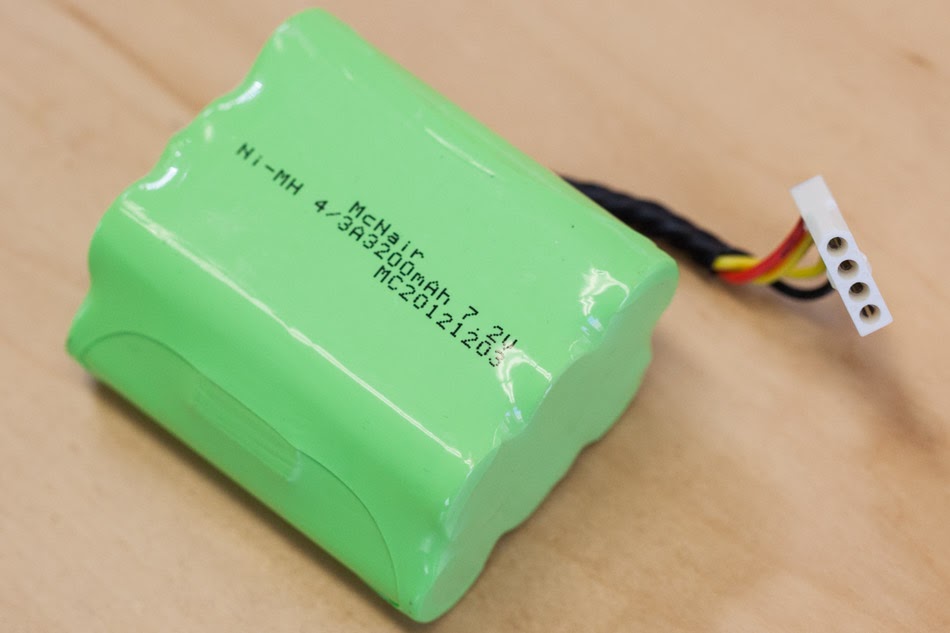
We found two battery packs after removing the small doors adjacent to the left and right wheels. Each 6-cell Ni-MH battery pack is 3200mAh. In contrast, the Roomba 650’s battery pack only has 3000 mAh of capacity in one battery pack. However, a bigger battery doesn’t always mean longer battery life.
The wheel module is very similar to the one found on the Roomba, but Neato’s wheel hubs use less plastic.

Here’s a look at the Neato’s wheel gearbox. The motor shaft is geared down three times, instead of four on the Roomba’s wheel gearbox.

The magnetic encoder (tachometer) on the Neato and the Roomba look like siblings. The motors are about the same size, too. In the photo below, the Roomba’s motor is on the left, and the Neato’s is on the right.

And here’s the snap action switch under the wheel module. This is normally closed (pressed down), and when it becomes open, Neato knows its wheel has fallen off a cliff. Unlike the Roomba design, the switch and the extension spring are not part of the removable wheel module. This means removing the module can be challenging: if the switch goes out, there is no way for the user to replace it.

As we mentioned before, the Neato uses only one brush, whereas the Roomba uses two counter-spinning brushes. The brush that’s installed in the Neato when we got it is a neat hybrid design: it’s both a beater brush and a bristle brush. Neato also comes with a second brush that’s a pure beater brush.
There’s no “dirt detection” feature like the piezo on the Roomba. The motor that drives the brush can’t be removed from the bottom just yet, which makes the brush module less replaceable than Roomba’s.
The fan is located in the body of the vacuum instead of the dust chamber like Roomba. It’s much bigger than the fan found in Roomba’s Aerovac bin—as soon as you turn the Neato on you can hear the difference between it and the Roomba. The Neato sounds like a jet engine spinning up and gives the impression of high power and performance.

The advantage of having the fan out of the bin is that replacement bins will cost less. The disadvantage is that if the fan goes kaput, it’s not so easy to replace. We’ll also note that this fan looks like an off-the-shelf component.


Now that we’re done with external components, let’s see what’s inside!

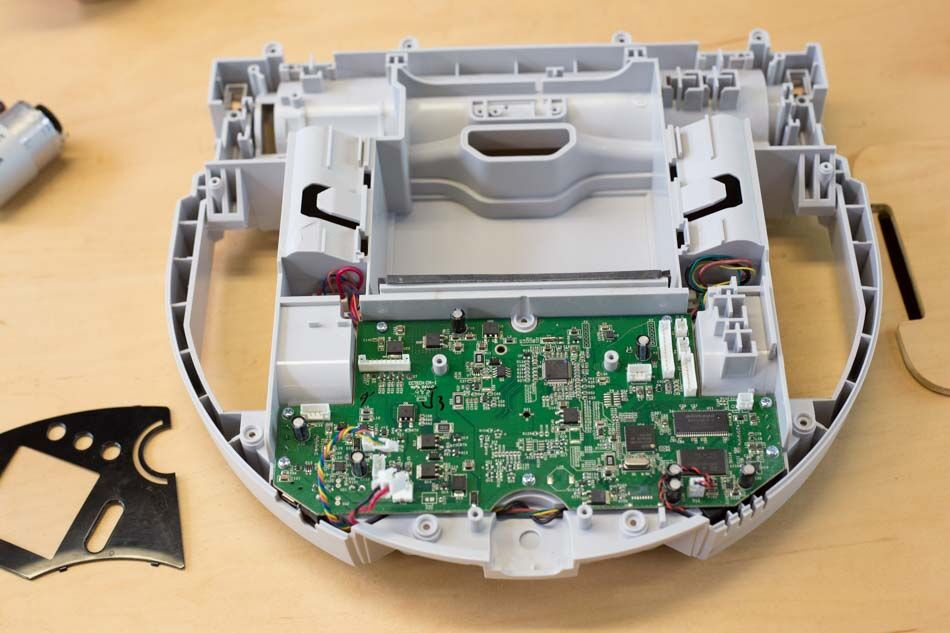
The first thing we noticed is that there are a lot of wires. By using board-edge connectors, Roomba was able to eliminate wire harnesses from the replaceable modules to the main PCBA. In contrast, Neato chose to use more traditional, connectorized wire harnesses.

With all these wires, you have to do some routing. There are pairs of posts designed into the top cover for this purpose, but it seems like they were insufficient. That’s nothing a little hot glue can’t fix though!

Here’s a look at all the buttons that the user interacts with, located in the cover panel. The three little black buttons are unique in their edge notch arrangements, preventing assembly error. That’s nice DFA!
Around the bigger orange button, there’s an arc-shaped light guide. It has aluminum foil on its backside to maximize total internal reflection, which can help with color mixing and minimizes losses.

The front bumper is also attached to the cover panel—This reduces the impact of collision on the main body.
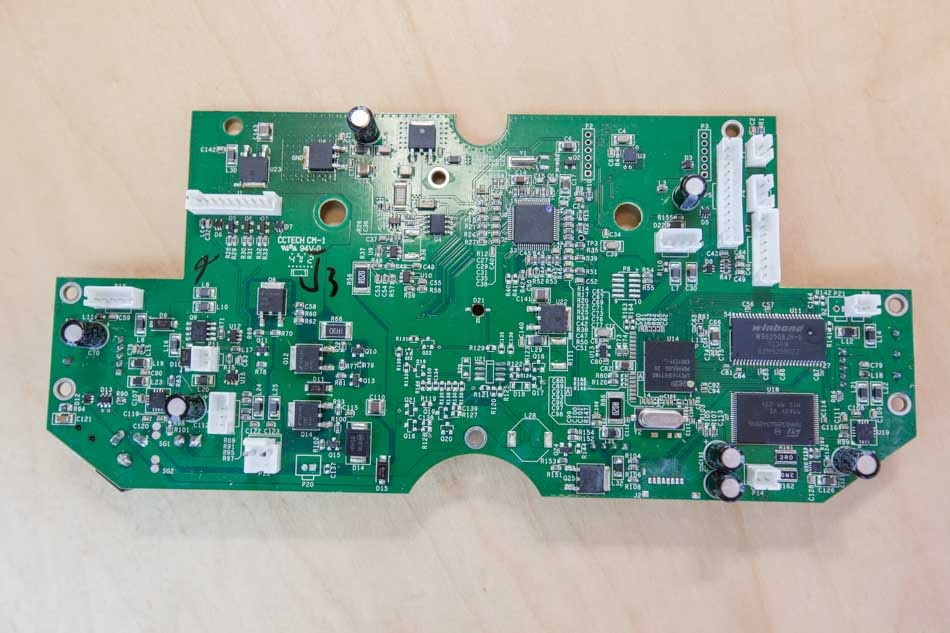
We get all the wires out of the way, so you can see clearly that the main PCBA is noticeably more compact than Roomba’s. It also features more integrated circuits.
Navigation System
When it comes to obstacle detection sensors, Roomba used many small IR sensors with limited range and resolution. Neato’s approach is very different. We’ll take a closer look at its precision sensors a bit later, but for now we’ll just note that the only side facing IR sensor is found at the front corner of the robot and helps with wall following.

We had a really hard time trying to remove the lone IR sensor, because the screw can’t be accessed top-down. It’s nestled in an undercut… why? This is just horrible DFA! Seems like assembly is an afterthought here, sadly.

Beside the wall-following IR sensor, there are also IR sensors on either side of the brush cage to detect cliffs.

These are off-the-shelf IR sensors made by Sharp.
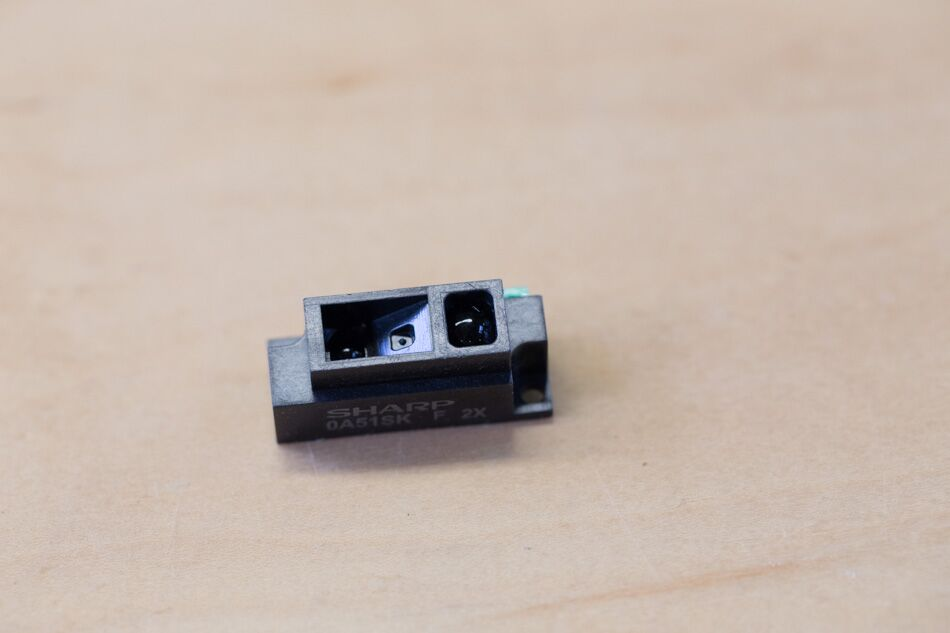
The Neato has 2 mechanical bumper sensors (keypad switches) as well. These are nowhere as beefy as Roomba’s bumper sensors, but who says they have to be?

You are probably wondering by now, how come Neato has so few navigation sensors? Well, last but not least, we look into the “patented laser-guided technology” that scans and maps the room, allowing Neato to plan its path instead of dealing with one obstacle at a time.
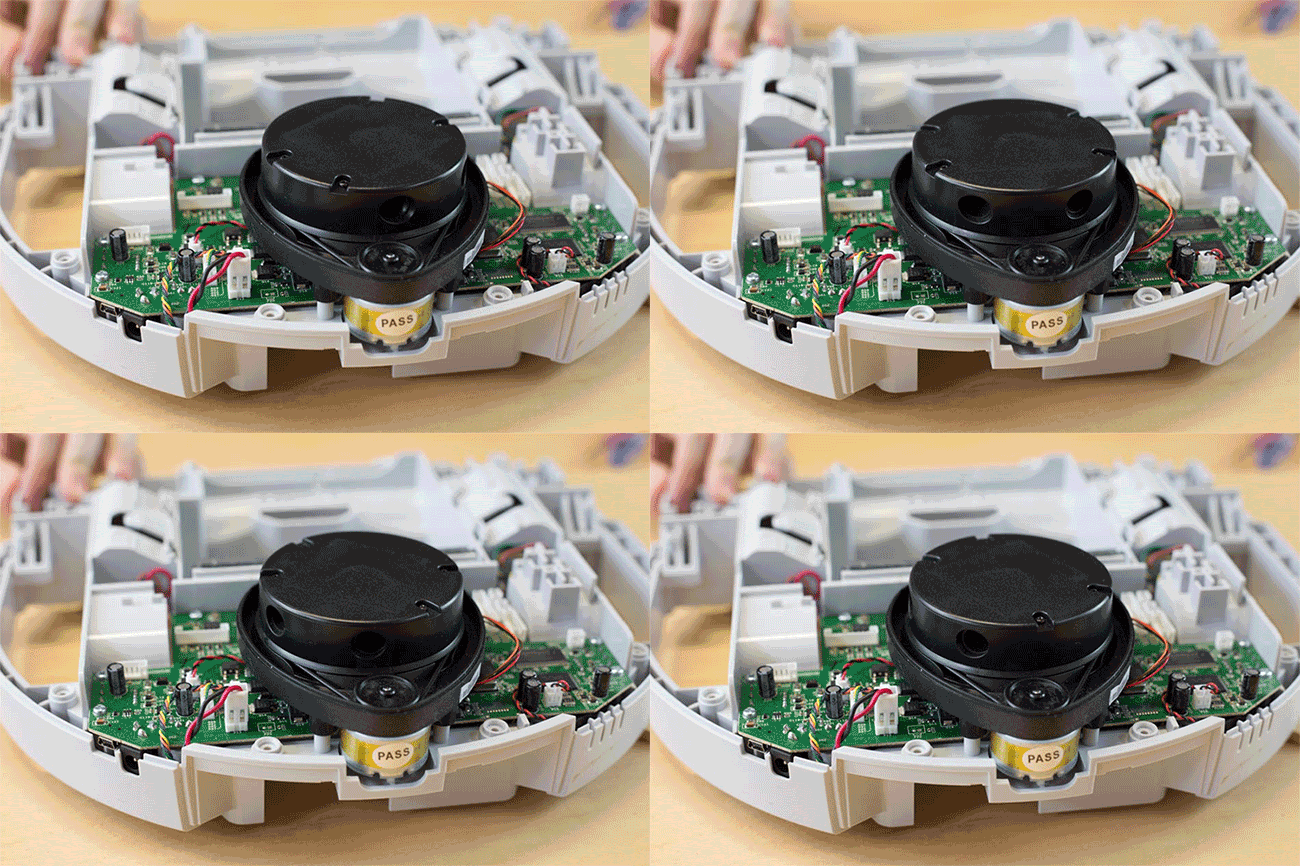
On the mapping module’s bottom side, We can see the small DC motor that drives the motion.

Removing the cover on the top side, we see a small pulley and a long belt. The output pulley is the entire laser module, and it’s huge compared to the input pulley. That’s some serious gear-down.
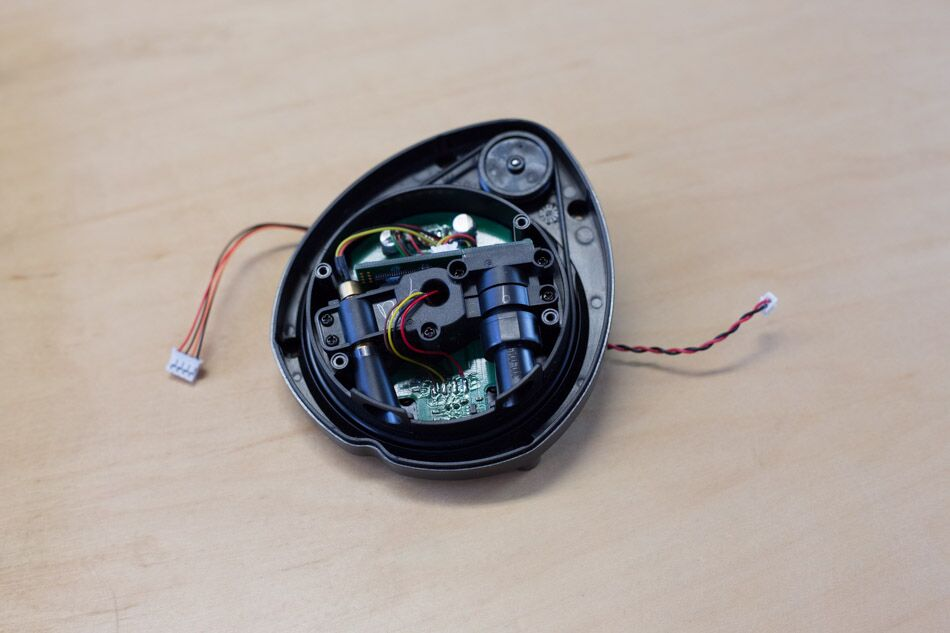
Here’s the laser emitter and receiver module.
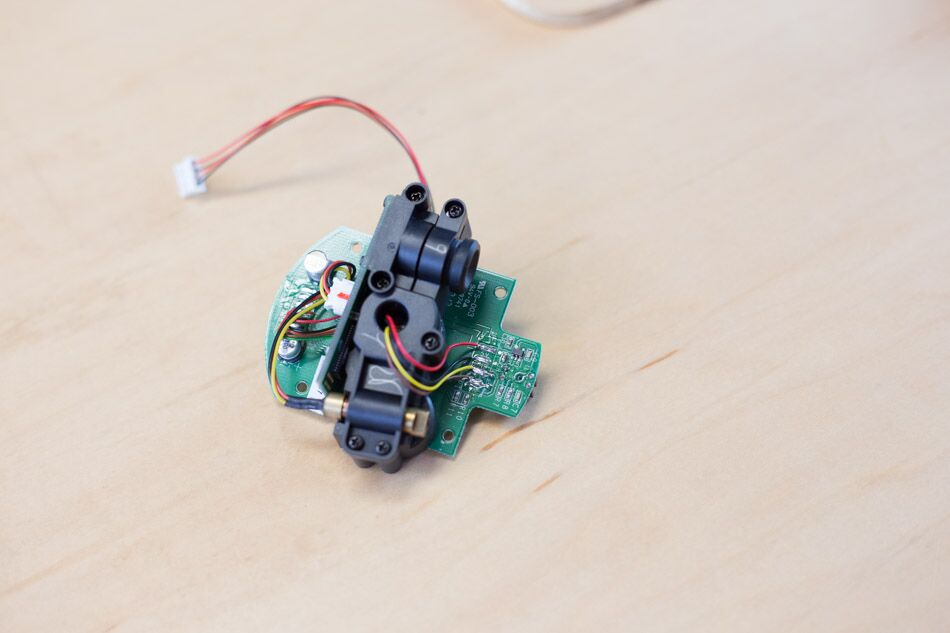
The optical pieces seem like off-the-shelf components.
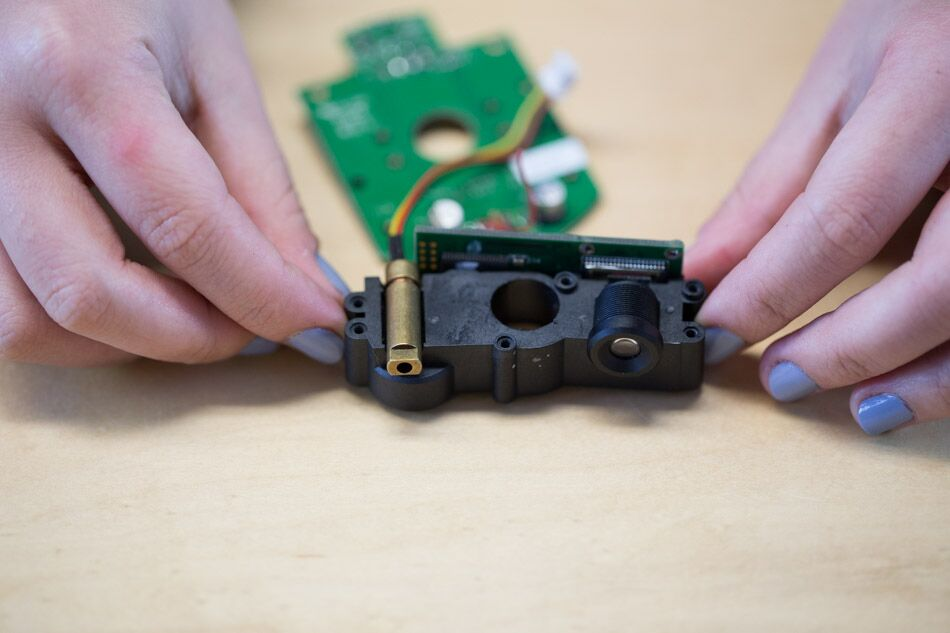
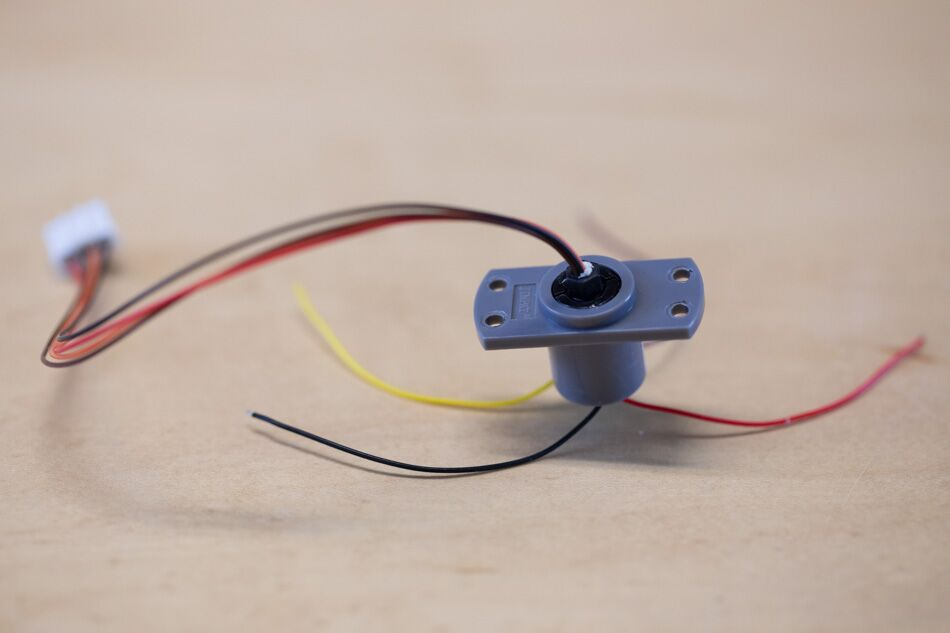
When electric power and signal need to be transferred from a stationary object to a spinning object, a slip ring is used. This is an off-the-shelf component. The round cylinder goes right through the hole seen in the laser assembly.
It took a bit of prying to get the bearing off the base—the bearing is held in by cantilever snaps.
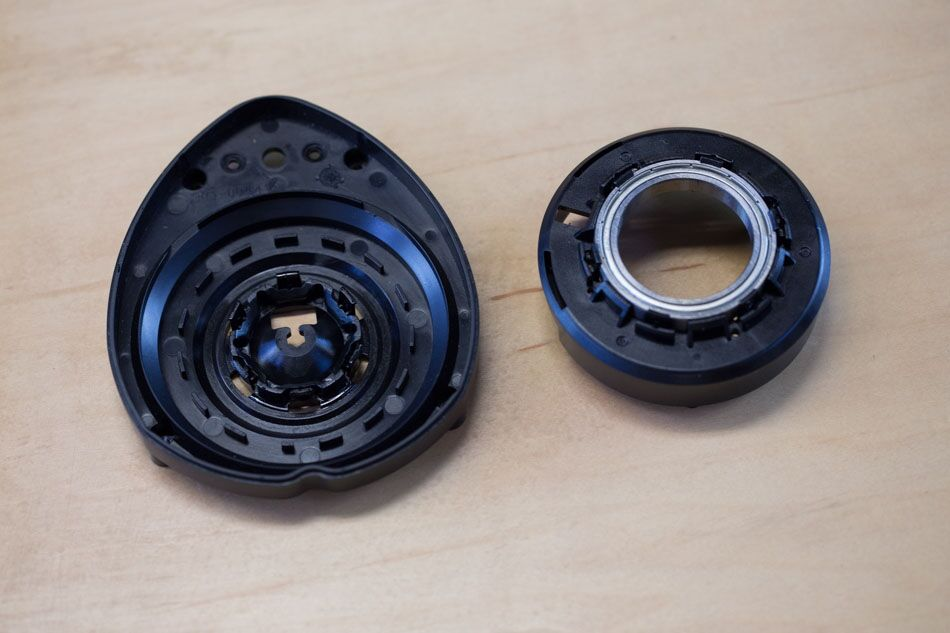
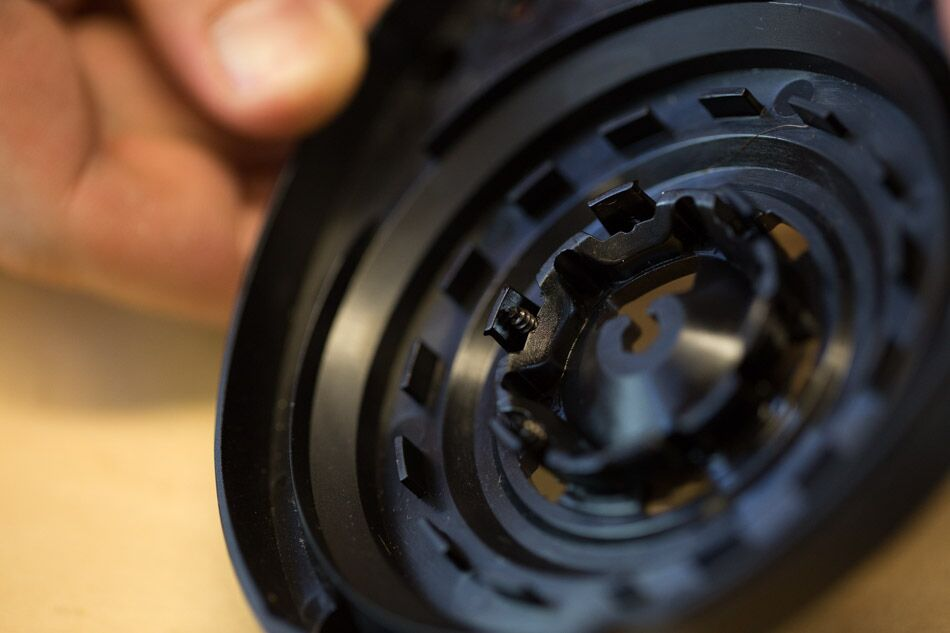
Screws are put in behind the cantilever snaps to prevent the bearing from coming off. Tricky!
And that’s all for Part 2 of the Great Robotic Vacuum Showdown! Let’s tally up the results:
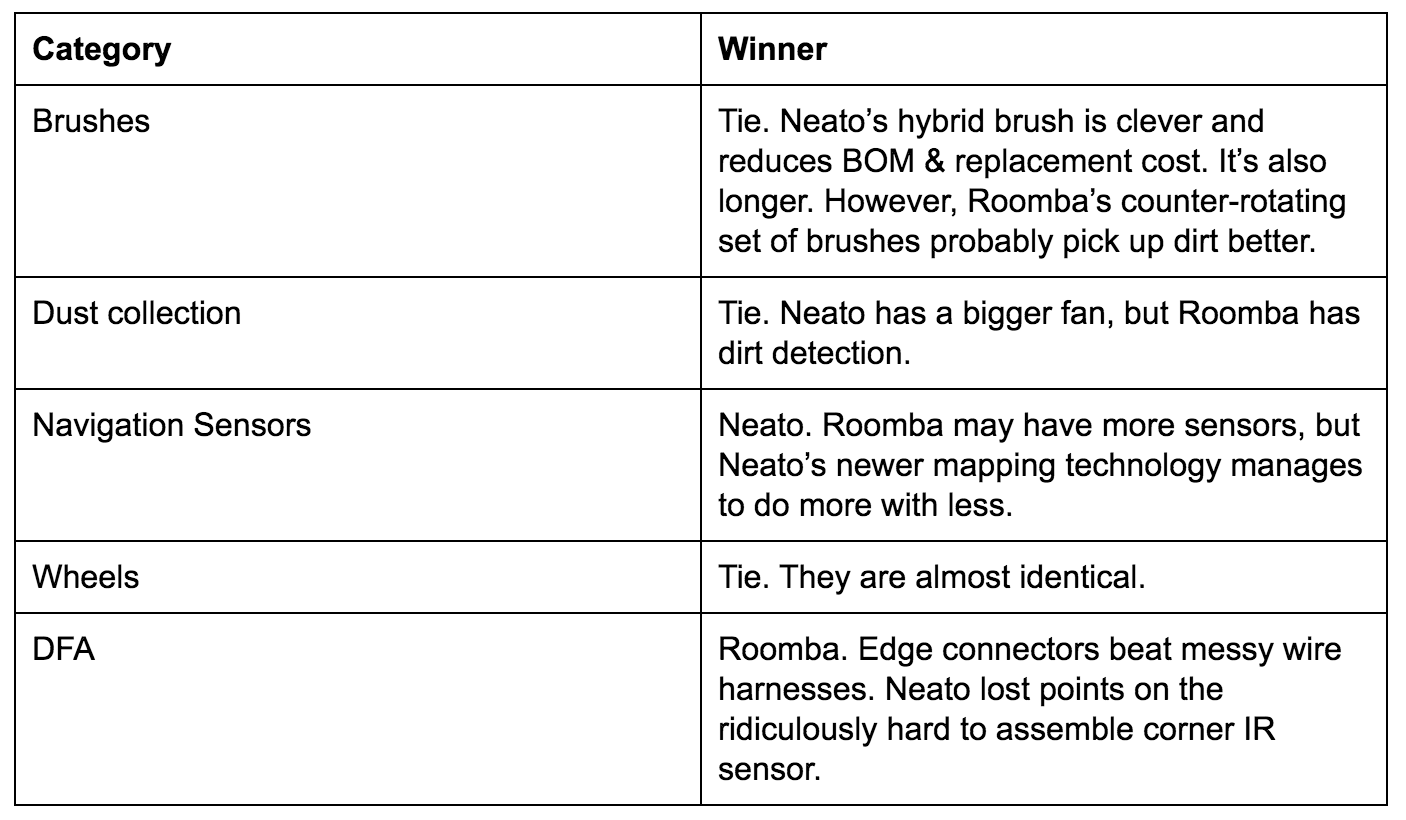
So we have a winner! The better engineered product is Roomba 650. However, it won just barely. iRobot had an 8-year head start, which definitely contributed to Roomba’s well thought-out repairability features.
However, we have to say Neato’s room mapping technology is really cool and comes at a bargain price. iRobot finally came out with its own room-mapping technology in its latest model, but it will set you back nearly $900. Each robot really has its own unique appeal, and it is great seeing the battle of innovations.
