Time to read: 4 min
Foamcore (also known as foamboard) is a lightweight building material that typically consists of a foam inner layer covered on top and bottom by paper. It’s cheap, easy-to-use and can quickly create scale models.
There are 2 main applications for working with foamcore:
1. Early user testing
Working with foamcore makes sense for applications where you stand to learn something by placing a model in people’s hands — you can learn a lot by watching how users interact with your model.
2. Large models
Another application where foamcore makes sense is with large models. 3D printing is revolutionizing the way prototypes are made, but on large parts this can be relatively a slow and expensive process.
For example, a relatively simple box with dimensions similar to a shoe box might cost you over $1000 for a 3D printed model. Instead this could be put together for just a couple of dollars in material using foam core. Using foamcore early on in the process allows you to burn through the first couple of iterations in the matter of hours with only a few dollars spent.
2 limitations to consider when using foamcore are:
- it won’t work well on small or highly detailed parts (this is where 3D printing or CNC is your best bet).
- it doesn’t stand up well against environmental conditions.
To help you build better models with foamcore, here are a few key techniques you should master:
Supplies
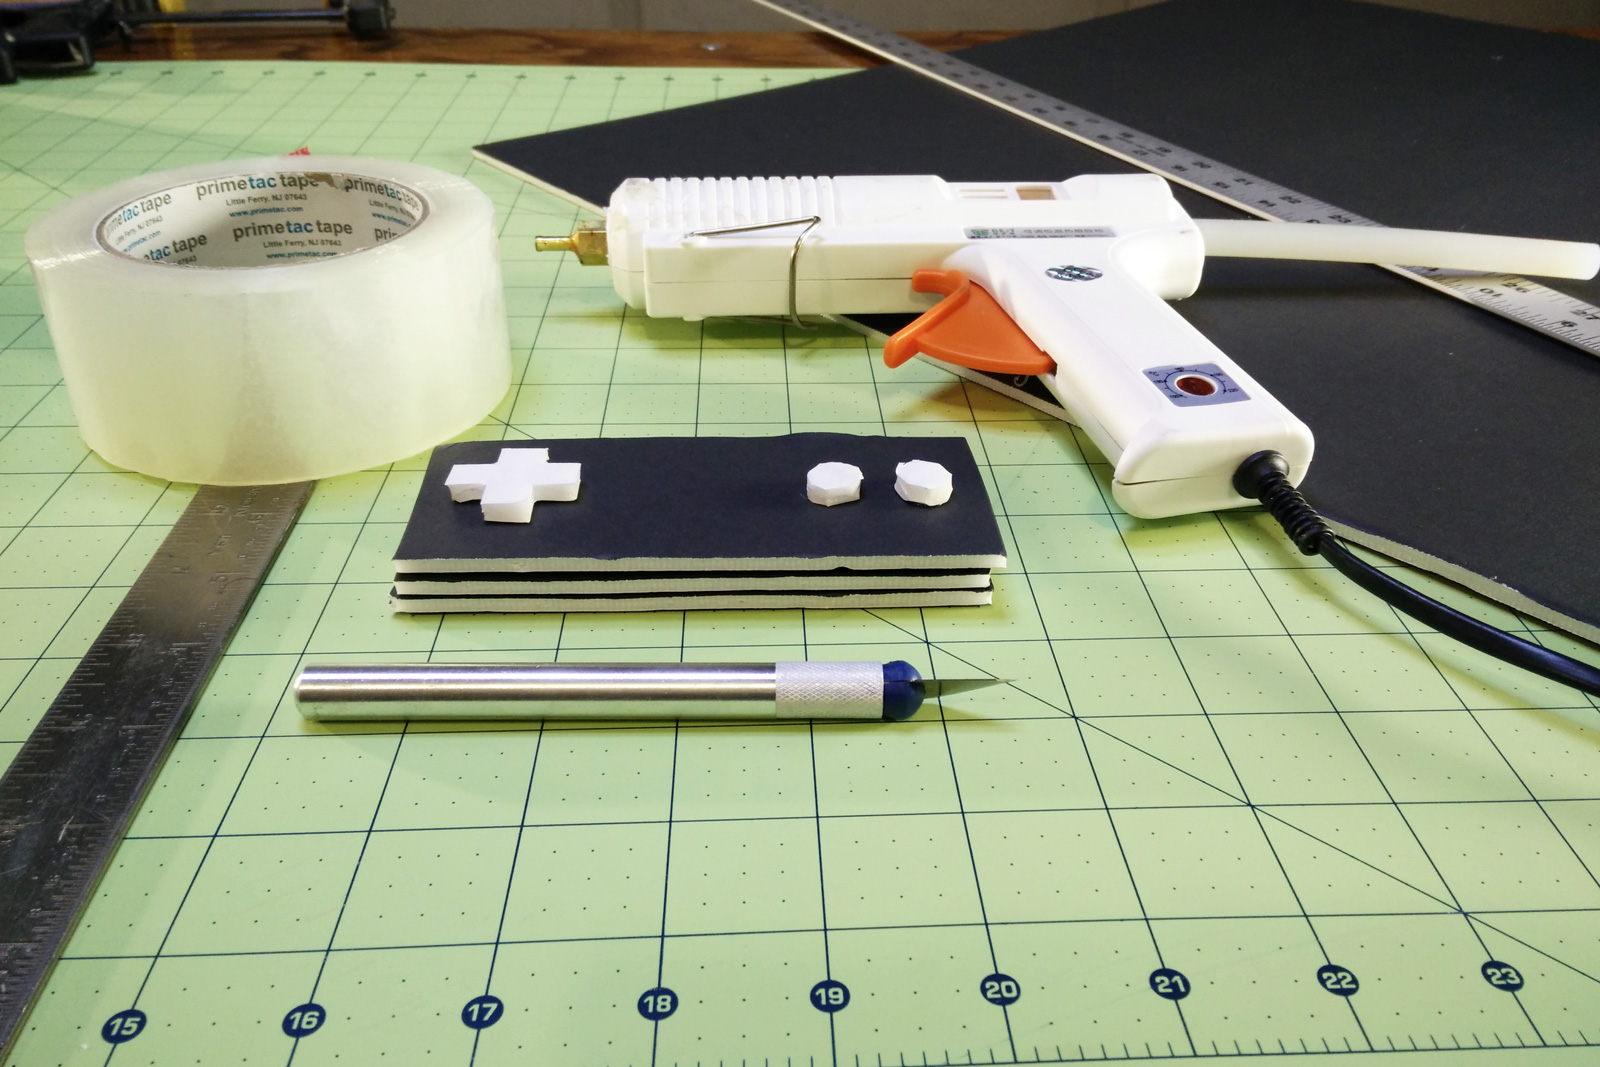
Before we get to the techniques, here are the supplies I’m using for this guide:
The board used in all the examples pictured is Readi-board, which is manufactured in the CN by Adams manufacturing. It can be purchased in bulk online, however I picked up my sheets for $1 a piece at my local Dollar Tree store. The sheets typically come in a 20” X 30” size and have a thickness that’s a little less than a quarter of an inch.
Other tools include:
- Hot glue gun
- Ruler
- Clear packaging tape
- Pencil
- Exacto knife or box cutter
That’s all you need! Simple stuff.
Note that you should use a knife with an easily replaceable blade — a fresh blade is important and makes the process a lot smoother. No one wants to battle a dull blade that does more tearing than cutting.
Joining Techniques
The Basics
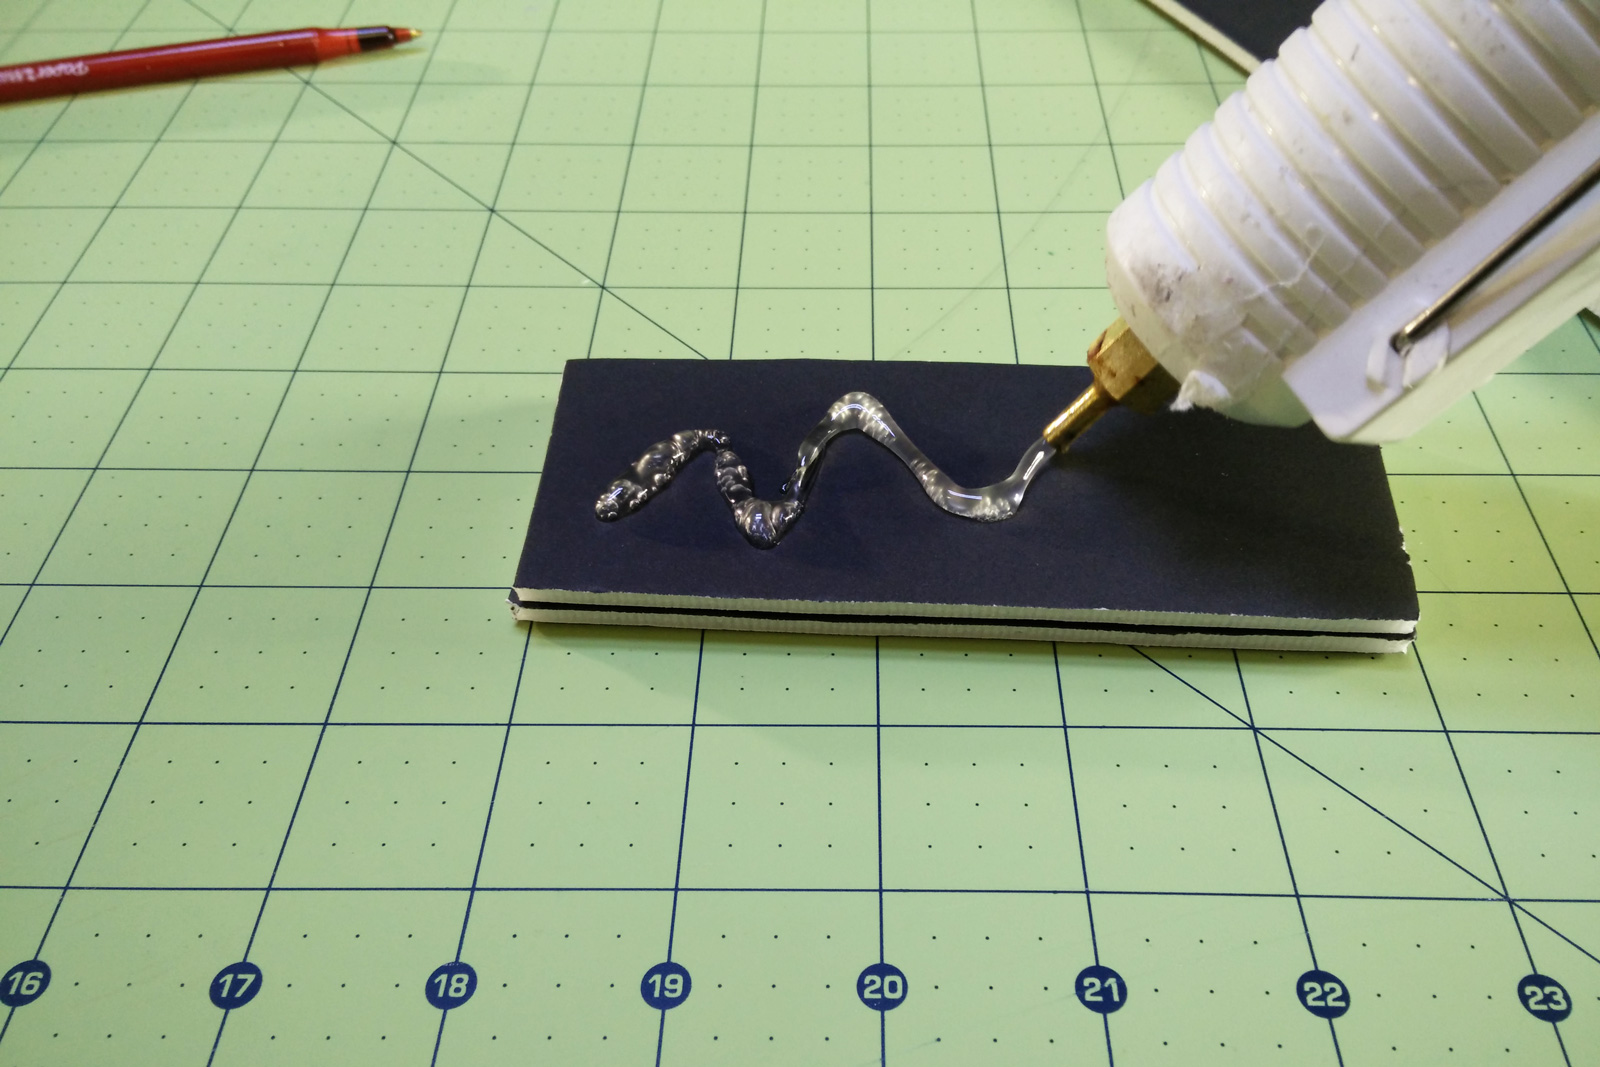
The most common joining technique when working with foam core is to use hot glue. It’s quick, cheap and easy to use, much like foamcore itself.
Glue can be used to join panels together or hold a corner joint closed. Any hot glue gun should do the trick, but if you’ll be doing a lot of work, I’d recommend getting a higher power unit with adjustable temp settings. Something around 100 watts is nice and allows you to put down glue as fast as you can pull the trigger. The adjustability also comes in handy by allowing you to control how long the glue is workable — If you have a really long seam it’s helpful to have more time to get it filled, spread evenly and then held into position.
Clamps can come in handy when doing glue ups, but anything heavy will most likely get the job done. The technique I use the most often is to just hold the joint in position by hand while waiting for the glue to harden. Simple, I know, but effective!
If you’re looking to model different style corners, there are a few techniques you can use:
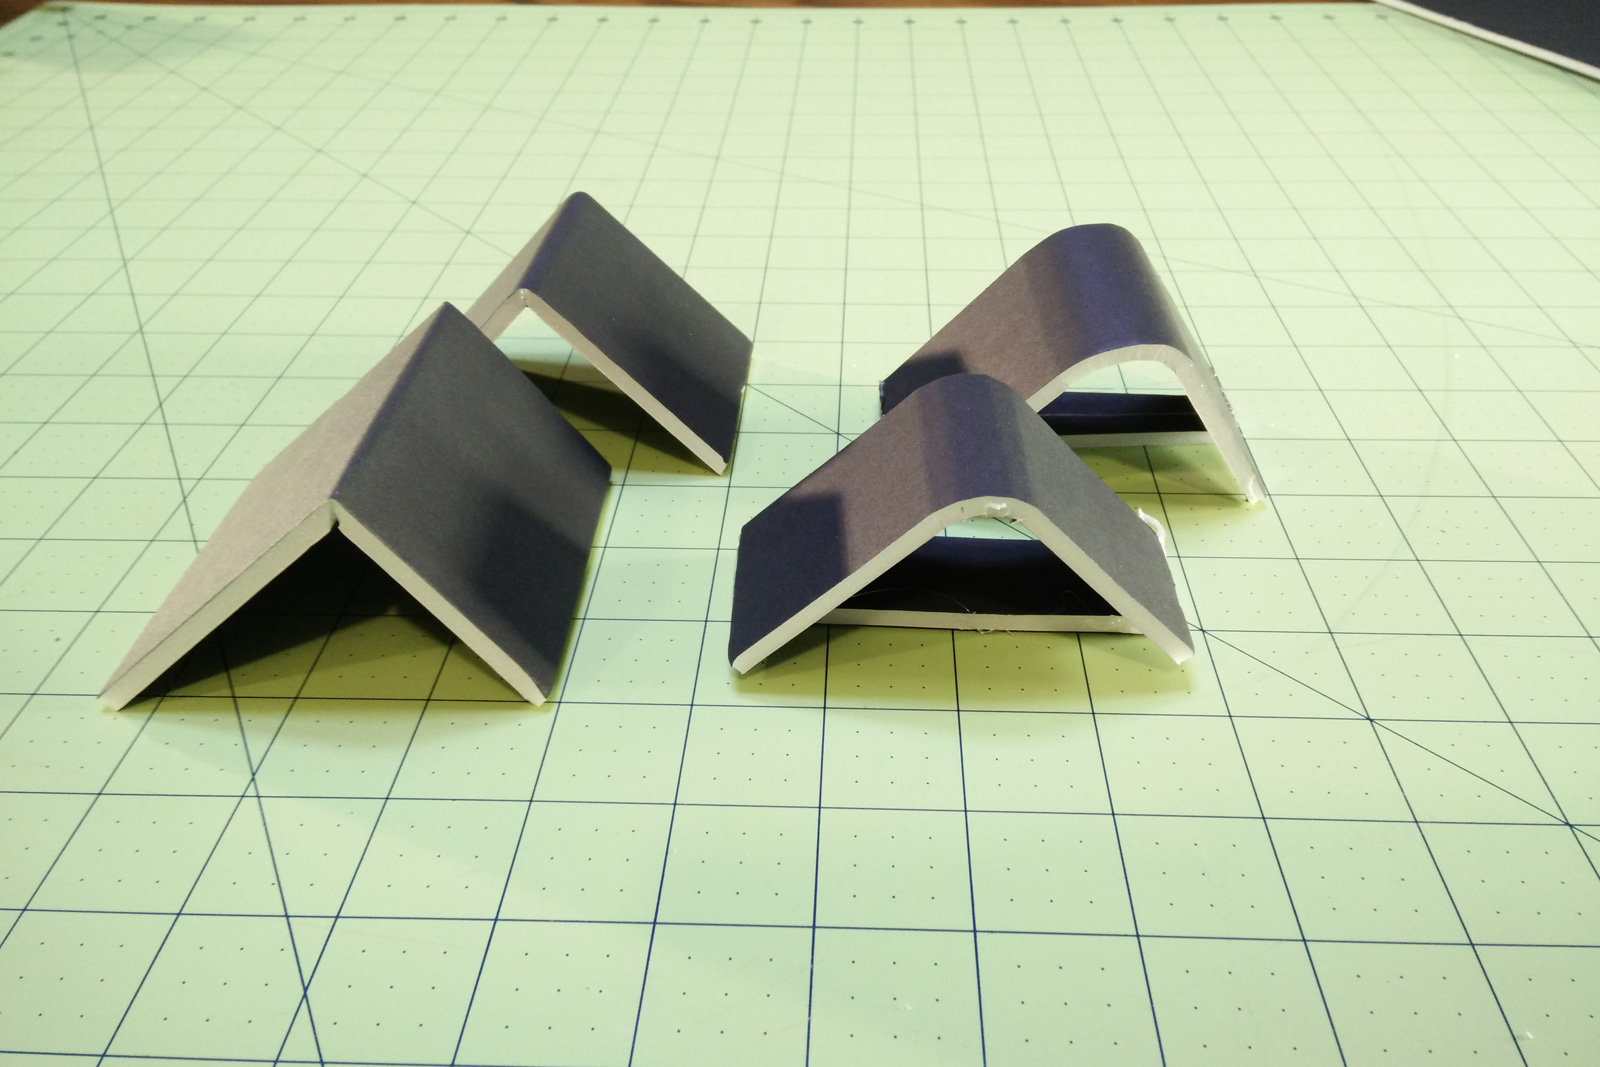
Gentle Corners
Very gentle corners can be created by removing the paper on the backside of the joint and working it into shape by hand (see back right example above).
For a little more control, you can create a number of small kerfs on the backside. If you adjust the spacing and width of the cut, this will also afford you more control over how the corner results (see front right example above).
Sharp Corners
If you want a tighter corner, you have a couple of options:
Removing material with a chamfer on the backside will give you the sharpest corner, shown in the front left example above. Alternatively, you can score the backside with a blunt object to get a corner like you see in the rear left example above.
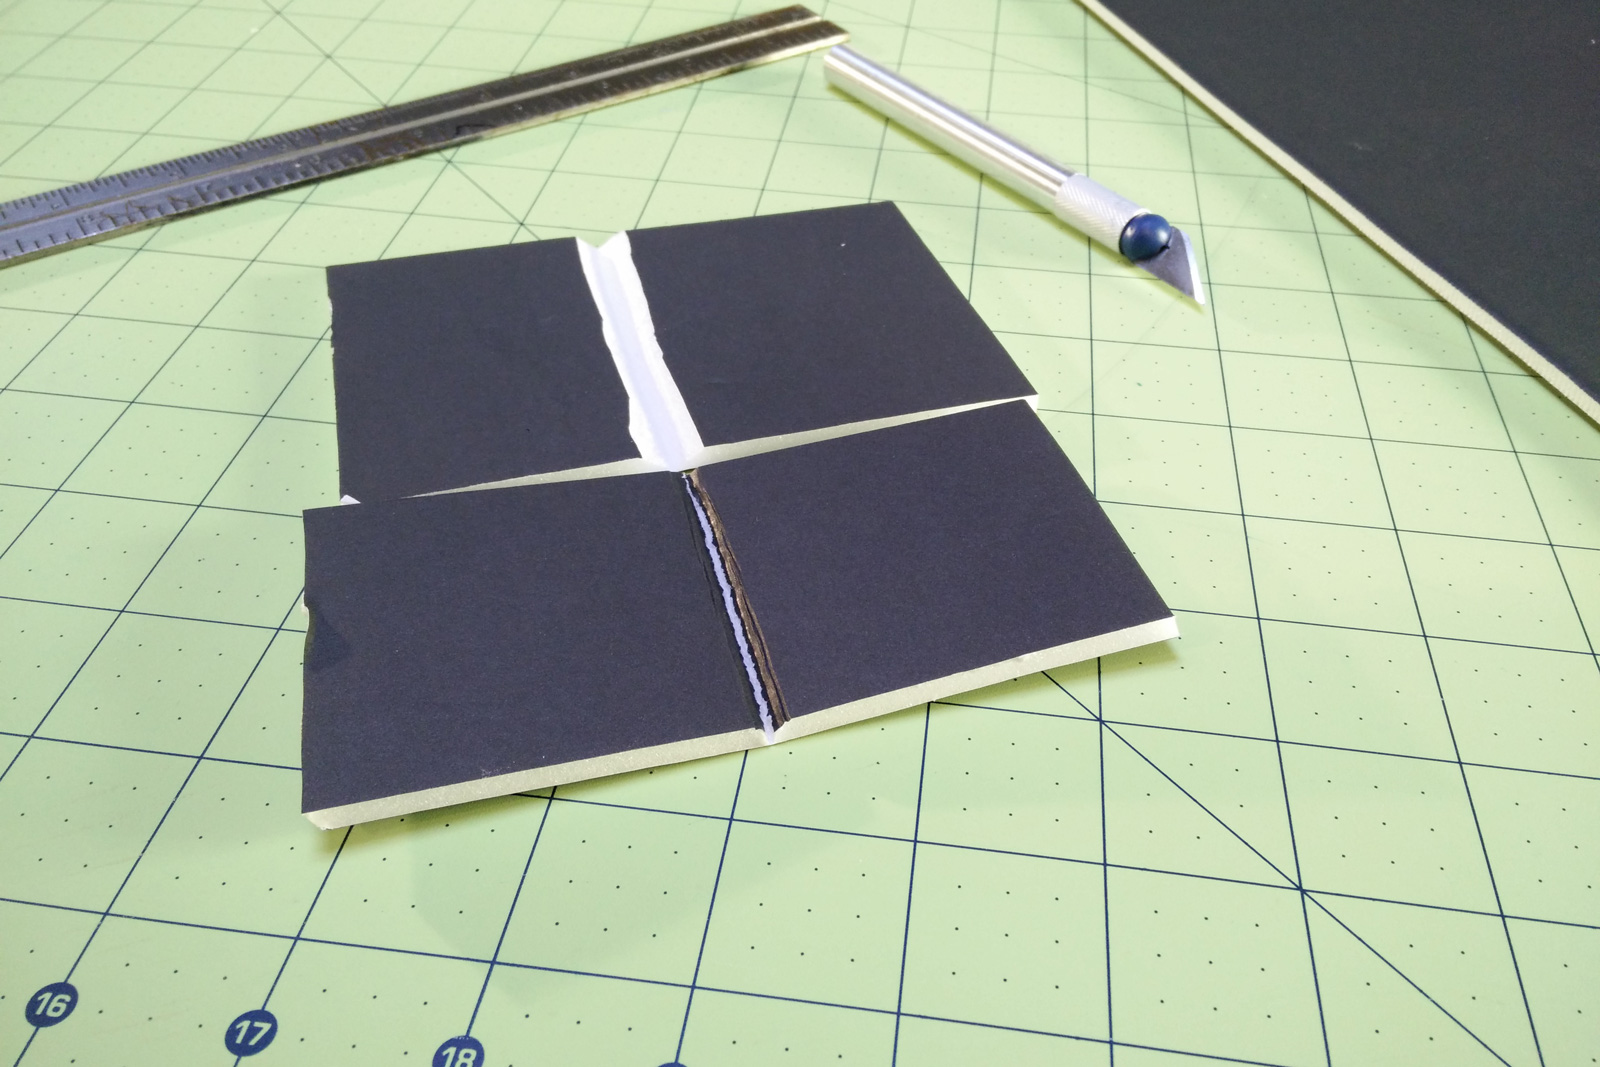
To create a sharp corner, you can cut through the backing paper and the foam, leaving the outside facing paper intact. Then chamfer both sides on the back at 45 degree angles.
Do a test fold of this corner to ensure you’ve removed enough material and a sharp corner can be achieved. Once you’ve done the test fold, open the joint back up and fill it with hot glue, using a scrap piece of foam to help spread the glue evenly across the joint.

Flexible joints
A flexible or living joint can be created using a process very similar to what’s described above for creating a sharp corner. But this time, instead of filing the joint with hot glue and closing it to a 90 degree angle, just leave the joint open with the outward facing paper down and reinforce the backside with tape. Thin clear packaging tape works really well in this application.
If you want to take your foam core work to the next level, you can find a number of interesting tools online. A company named FoamWerks has an impressive looking lineup of tools that would address many of the pain points encountered when working with foam core.
New product development and prototyping is a process — typically a process with many steps and iterations. By integrating a material like foamcore into the early stages of that process, you can help streamline your approach and build a foundation for the following stages.

